How to Add a Hood to Your Sweater
I did not begin my knitting career as a follower of patterns. I find this baffling since now, as the owner of a yarn store, I spend hours each week reading patterns like they are poems, analyzing them for clarity, coherence, and purpose; wading through hundreds of possibilities to find the perfect pattern to show off a new favorite yarn.

I had no idea. My first year of knitting was spent without a local yarn store, without Internet, and with a lot of free time. I figured patterns were an option, rather than the norm. So when I decided to make my first sweater, it didn’t even occur to me to check and see if someone else had done this before, and had written down some instructions.
But this post is not about my first sweater, or even my second sweater. It’s about my third sweater. Back in the States, two years later, I stumbled across Debbie Stoller’s Stitch and Bitch, when it was still in its early years, and it blew my mind.
All these things that I thought I’d made up myself — how to change colors, how to make buttonholes, how to increase — these were all things that other knitters had encountered before, and there were actually “best practices” out there for doing them!

When I came face to face with Under The Hoodie, I was flabbergasted. You can knit a hooded sweatshirt…with a pocket?? This was how I became a pattern knitter. In fact, this was the first pattern I ever followed, and wouldn’t you know it, if you follow the directions, you end up with a hoodie sweater.
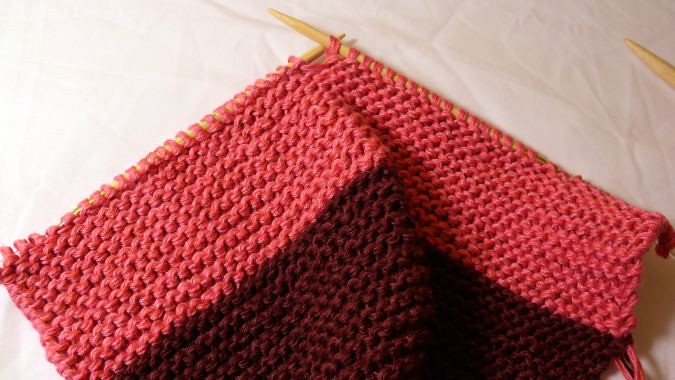
What really amazed me about this sweater was that adding a hood seems like a super advanced skill, like something you conquer after socks and lace and cables. But really, it’s fantastically simple, and I’m usually tempted to add a hood to almost everything I knit, which is why I’ve been going nuts with the hooded Baby Surprise Jackets. And I’m going to show you how to do it.
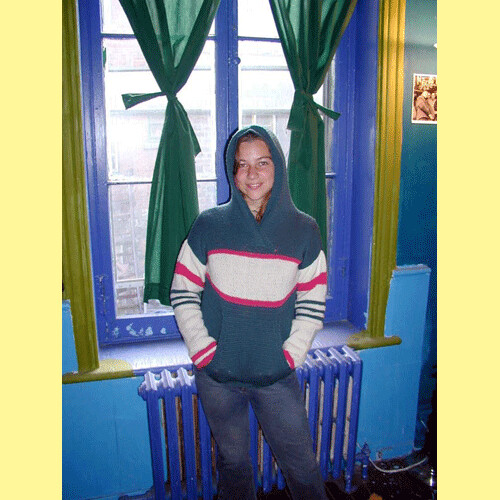 Me and my Under The Hoodie, age 20
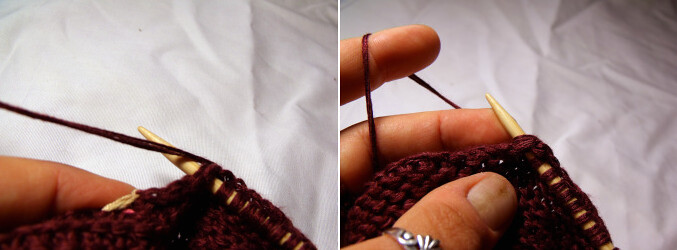
First, you’re going to pick up some stitches along the back of the neck and shoulders. This might sound confusing, because it’s hard to imagine where you’re going to pick these stitches up from, when they don’t exist yet. Picking up stitches to add a new piece, like a hood or a pocket, really just means pulling a new piece of working yarn through some stitches that already exist (like those along the sweater back), adding live stitches to your needle that are also connected to your already-knitted garment.
You’ll want to do this with the right side of your work facing you, so that the ridge that is created by doing this is left on the interior of the work.
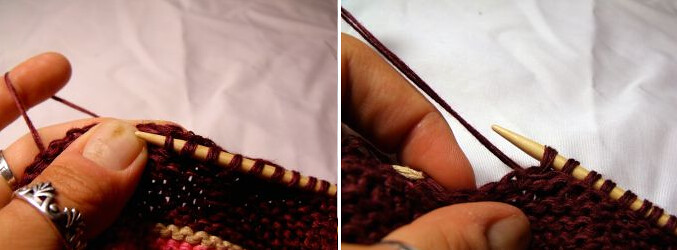
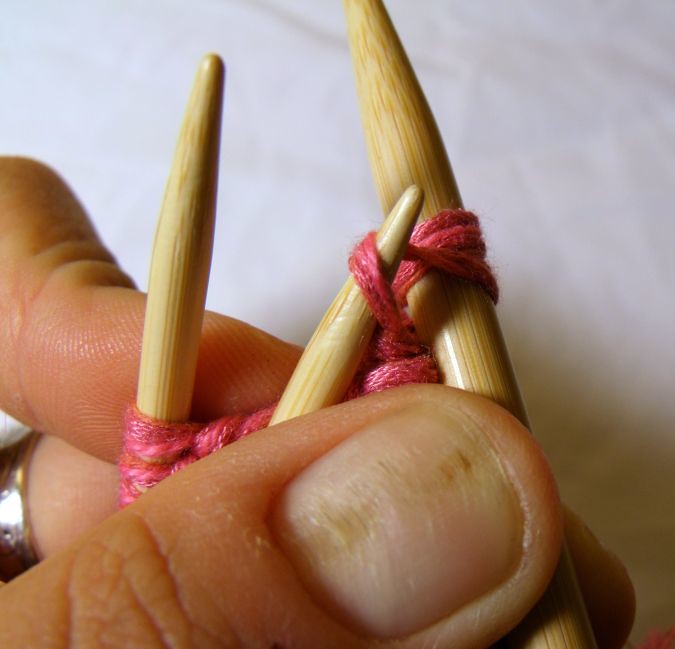
This picture shows a needle with some stitches already cast on, but when you’re starting out, your needle will be empty. Stick the needle through the first stitch, from front to back, and use it to grab your working yarn and pull it through that stitch. This can be a little tricky at first; you can make it easier on yourself by using a crochet hook to reach through and grab that working yarn, pulling a loop through that you can then insert your needle into.
Continue reaching through and pulling up these loops, and adding them to your needle, until you’ve gotten all the way around to the other side.
Then take a stitch marker (or in my case — where I always find myself at the crucial part in a pattern, without my toolkit — a hair elastic), and mark the midpoint of these stitches.
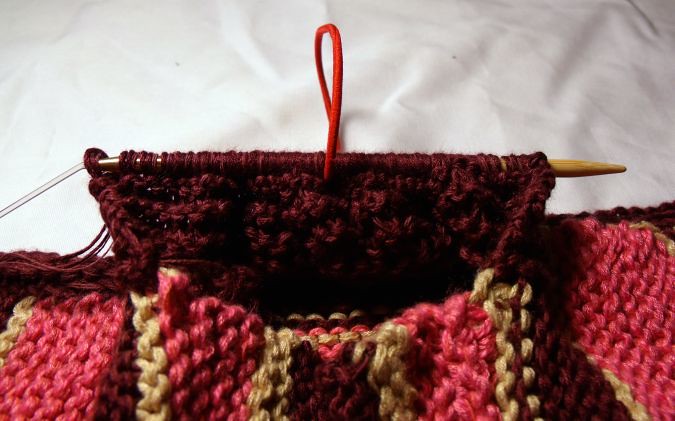
This is where you’re going to increase one stitch, before and after this stitch marker, every other row. This is what creates the hood depth. On a baby jacket like this one, I increase 9 times (a total of 18 stitches increased); on an adult sweater where you’re already picking up a hefty amount of stitches, these increases may be unnecessary (like in Under The Hoodie — no increases!)
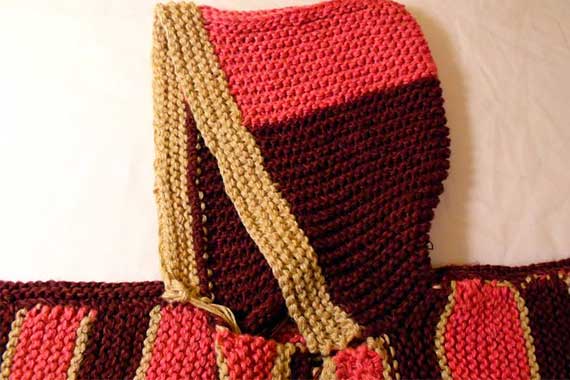
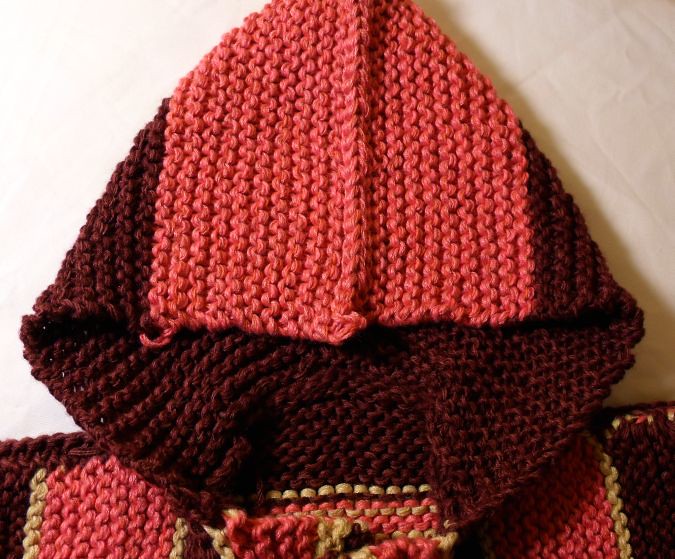
 See that subtle ridge of increases, right in the middle of the work?
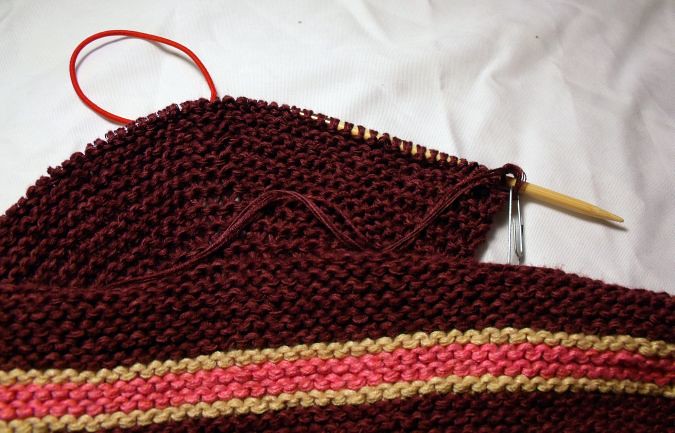
Then you’re going to happily knit even for awhile. Here I’m doing this in garter stitch, because that’s what the BSJ is all about. I’ve marked my place so I know where the straight knitting started; I’m going to go for 30 ridges here, whereas on an adult jacket you’ll want about 13″ of height total.
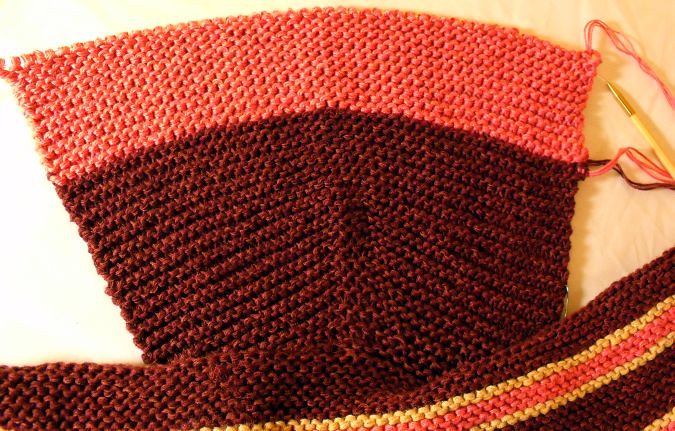
Now how does this blob of knitting become a hood? With the magic of the 3-Needle Bind-Off. There are a handful of situations where this bind-off can thankfully be used in the place of the Kitchener Stitch, and this is one of them!
Here’s what you do: on your next row, knit only half the stitches on your needle.
Then fold your work in half so that you have the same number of stitches on each needle, and they’re side-by-side.

Now take your third needle (you’ll want to find one that’s around the same size as your other two, but don’t stress about it) and stick it through the front of the first stitch on each needle, just like you would if you were about to knit two stitches together on the same needle.

Knit these two stitches together, leaving one neat little stitch on your righthand needle. (This can feel tricky to coordinate at first; you’re juggling a lot of needles and trying to scooch just two stitches off without causing a landslide. Don’t fret!)
Now do this again, so you now have two stitches sitting on your righthand needle. And then, just like in a regular bind-off, hop that bottom stitch right over the top one, leaving the top one on the needle.
You’re back down to one stitch! Now knit the first stitches from your partnered needles together again, and you’ve got your second stitch on the righthand needle, ready to be hopped over by the stitch below it.
You’re going to continue this process, alternating between knitting the topmost stitches together, and then binding stitches off one at a time, until you’ve bound off all the stitches along the top of the hood.
Now, you could stop here and call it a day…or, since you know how to pick up stitches, you could do that around the edge here and add a cute little border!