


How To Design Your Own Fair Isle
- Posted on: 2023-05-08
- |
- Views: 5752
- |
- Category:
- ▸ How-To's
***Originally published March 16, 2010***
So, a very good friend of mine is getting married this summer, and just recently an assignment for this event arrived in my inbox. Her aunt is making a quilt for her and her fiance, comprised of 8″ square panels made by all their friends. So cute! But, simultaneously panic-inducing because I have never been able to draw anything besides letters and geometric shapes, which I scraped by with for most of elementary and middle school, but felt like I needed to do something a little more special for an occasion like this.
So, I knew I had no choice but to make this square some sort of yarn-y creation! I played around with different ideas of granny squares, crocheted stripes, a plain single crochet square with embroidery…and then the idea struck: fair isle knitting! I’m totally stoked about this project, so I’m going to walk through my process with you, should you ever be faced with a similar challenge.
First, I did some hunting for a pattern. I’ve been known to transform JPEGs to graph paper before to create my own fair isle patterns, but I figured the process would be way easier if I started with an already-existing pattern. I found a fantastic, simple little tulip pattern on the Purl Bee, which I decided would be the foundation for my pattern.
So the first step, as with almost any knitting project (that you want to turn out as expected!) I made a gauge swatch. This would allow me to translate the 8″ square dimensions that I was given, into the grid on which I would plot my pattern.
I decided I wanted to make this entirely out of bamboo, to give it a nice, natural sheen and softness, and even-ness to the stitches. I wanted the mosaic to be fairly detailed, so I decided on two strands of our bamboo held together, knitted on size 2 needles.

See that? I’m getting 7 stitches/inch, and 11 rows/inch.
So…how does that translate to an 8″ x 8″ square? Well, if I were to expand that swatch to fill the entire space, that means I’d fit 56 stitches and 88 rows into that panel square.
So, back over to Excel to make some graph paper. (If you’re not an Excel-lover like I am, there are many sites that will make graph paper for you in whatever size you want, like this one. You can print it out and do all this by hand if you want!)
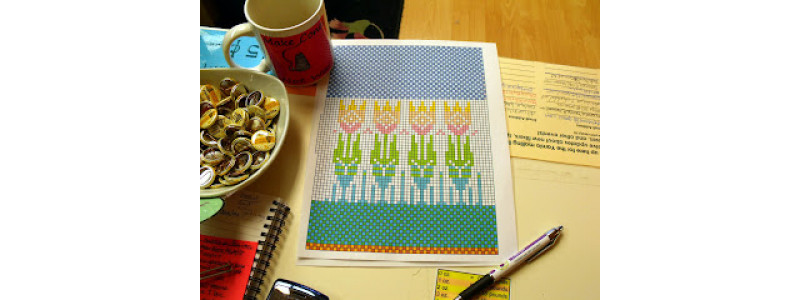
I made a grid that was 56 x 88, and that would be my template from hereon out. The tulip template I was using was only 12 sts wide by 37 sts high, which meant I’d be able to fit 4 little tulips in side-by-side, with 8 stitches left over (4 on either side). I divided the extra vertical space evenly, which I decided would be layers of soil, grass, and sky above, knitted in four different colorways of my favorite variegated bamboo yarns (only grass layer shown in this screenshot).

So what’s next? I wound up all the colors I’d be using…
 Got my coffee at the ready…
 And got to work!