


How to Make a Log Cabin Blanket
- Posted on: 2020-05-25
- |
- Views: 31467
- |
- Category:
- ▸ How-To's
Originally published January 30, 2014
One of my good friends is due in April, and after having just finished a crocheted baby blanket for my cousin, I decided I wanted to knit this one. And you know what I haven’t made in forever??
A Log Cabin Blanket!
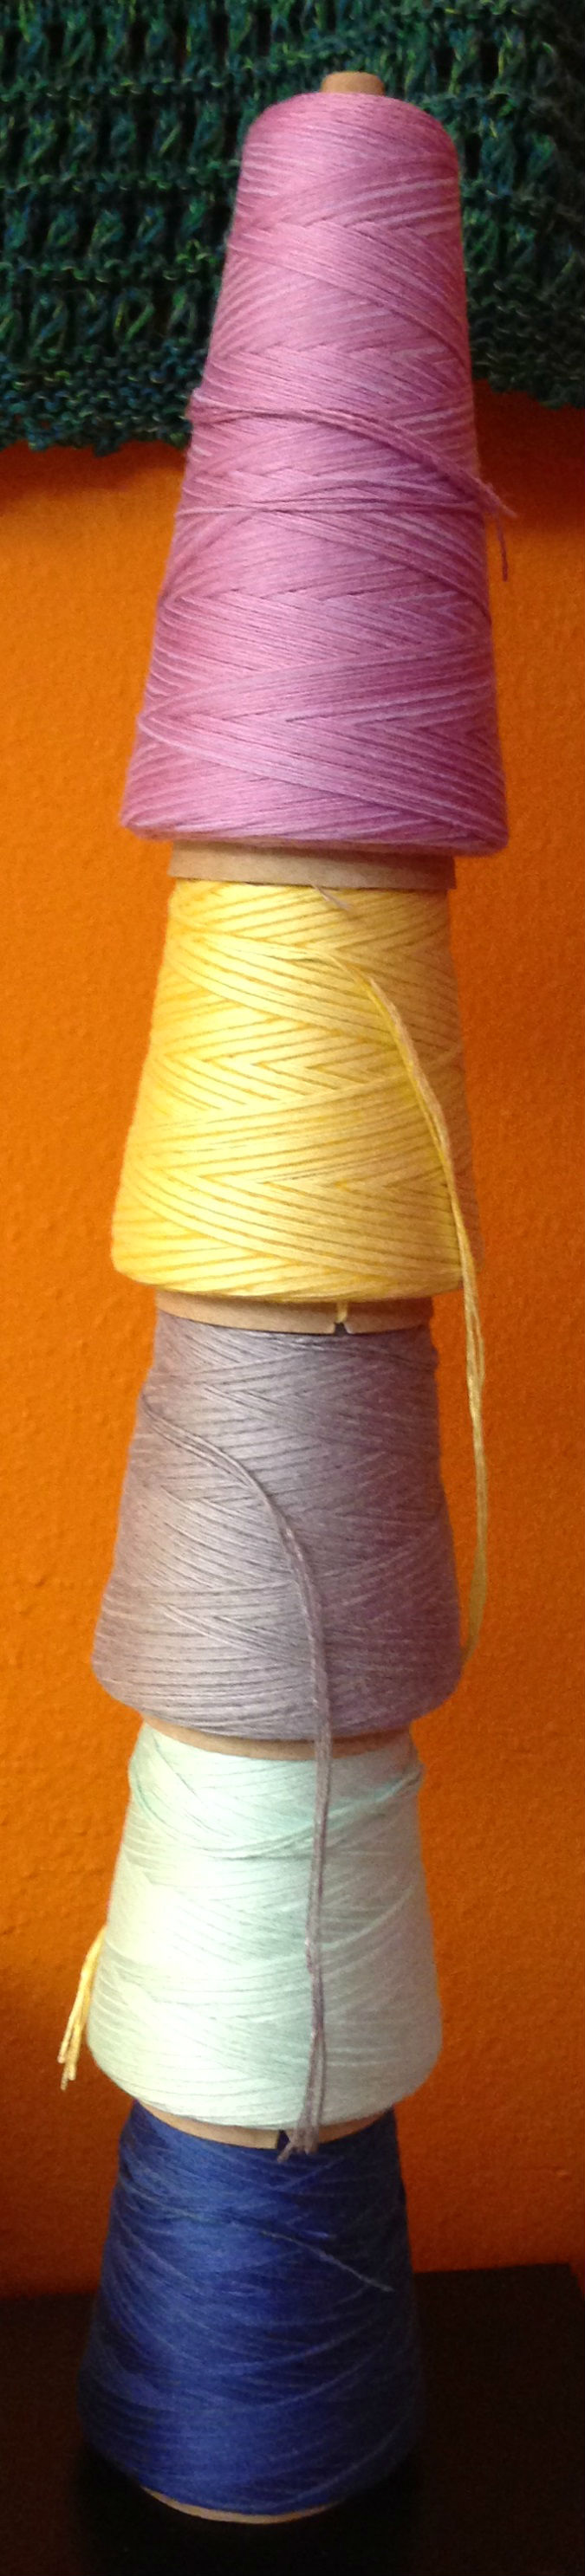
So, I wound up five different colors of semi-solid yarn (I used a bamboo/acrylic blend for these — each one is 3 strands bamboo + 1 strand acrylic so they’re exactly the same weight, and they all look nearly solid).
The beauty of log cabin blankets is that — unlike most any other square knitting project, it begins at the center and builds outwards, which is a delicious kind of construction for a baby blanket.
Right about when the rows are starting to become tediously long…you’re done! I find projects that grow (or shrink, as is the case with reverse raglan shaping) so satisfying, and the wonderfully mindless nature of garter stitch that’s used here makes the log cabin blanket even more so.
Here’s how a log cabin blanket is constructed:
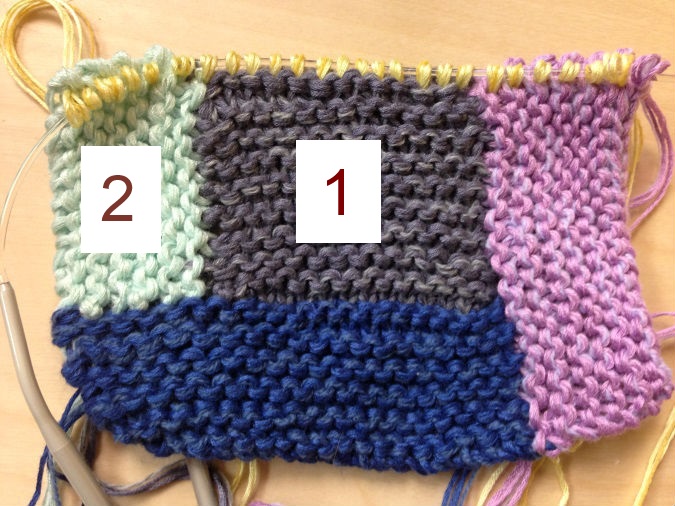
You start by knitting a garter stitch square — this will be the very center of the blanket.
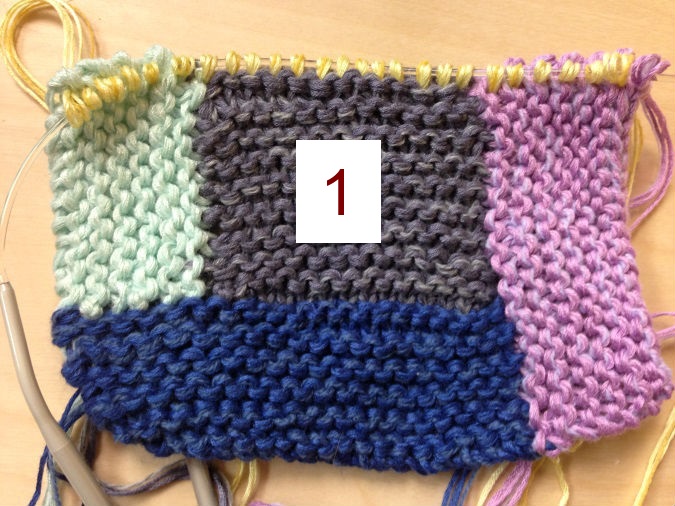
Log Cabin Blanket
Then, on a right side row, you bind off all the stitches but the very last one. Now, instead of binding off that last stitch, you turn down the side of the work, and with a new color, pick up 1 stitch for each row you’ve worked. (If you’ve never picked up stitches along the side of your work before, stay tuned for a tutorial on this, coming next week!)
These picked-up stitches form the foundation for the next full row. In this case, I’ve picked up the side stitches using my light blue color.
The cool thing is, once you’ve done a few rows with your second color, the adjacent edge that you’ll be picking up stitches along once you bind off this color is not only as long as the number of rows you’ve knitted with color #2, but you’ll also be picking up along the bottom of color #1 as well.
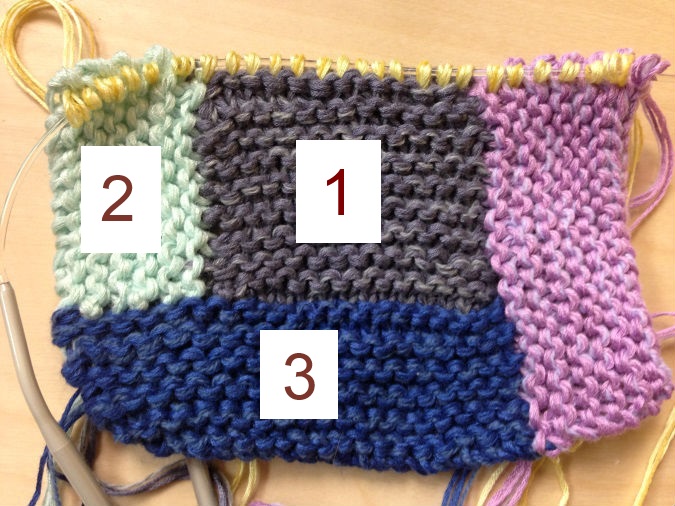
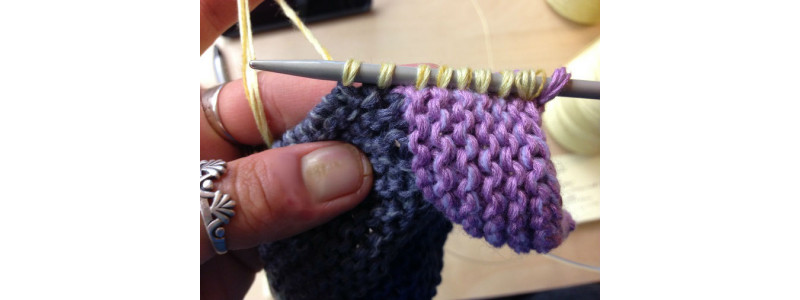
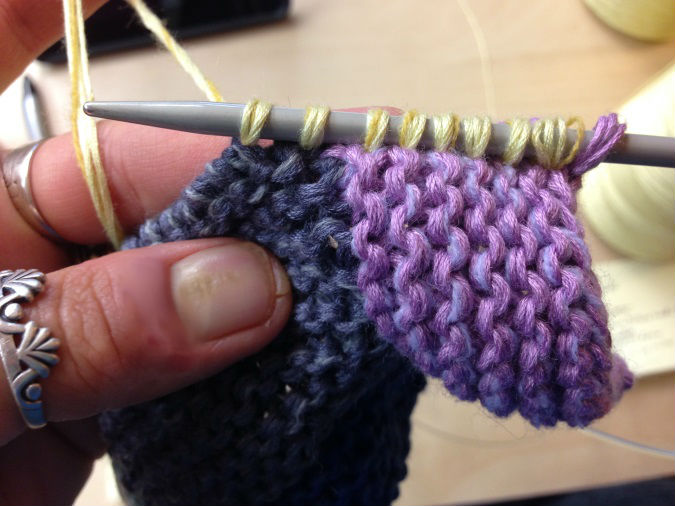
Here, you can see that when I pick up stitches for the dark blue section, I’m picking up about eight stitches along the light blue edge, and then all the original cast-on stitches from that first grey square as well.

Then, when it comes time to pick up for color #4 (in this case, the lavender), I’m picking up an even longer edge, so that the foundation for the lavender section is as tall as both the dark blue and light blue combined.
In this photo, I’ve already picked up the foundation stitches for my final color, yellow. Even though I haven’t knitted that section yet, you can see that it will be as wide as the lavender, grey, AND light blue sections combined.
The blanket will keep building on itself in this way, getting wider and taller with each section knitted, until it’s as large as you want it to be!
The best part is, there’s no prescribed number of rows you need to knit per color section. You can make these as uniform — or as random — as you’d like. There is also no prescribed number of colors (here I’m using five, but it could easily be three…or six!), or order that you must rotate through.
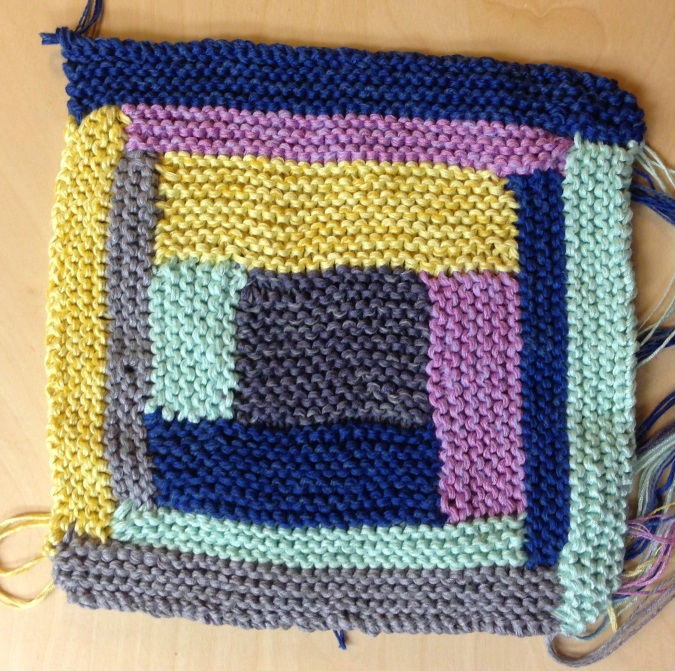
What I’m doing here is, after the initial 5 sections which introduce each color, I’m going to start with fairly thin sections of color (three garter ridges each), then as I rotate through one full “round” of colors, the next sections will be four garter ridges each, then five…
I’m thinking I’ll do this until the blanket is about halfway done and then incrementally decrease back down to 3-ridge sections again and then finish off with some kind of pretty border. Oh, and it looks a little lumpy here, but blocking does wonders for these once you’re finished! I’ll be posting progress reports as I go ;)
Comments:
- Posted by: Kate
- |
- Posted on: 2021-05-18
This is great, thanks so much for sharing!